The official source of news and updates about Envoyce
Invoicing Workflow Tutorial
Today we are looking at invoices. Specifically, we’ll cover creating invoices, adding customers and products, changing the invoice options, saving & removing invoices and draft options.

by Chris Hargenson
02 June 2025
Invoice Creation, Options, Drafting and Removal

From the main Envoyce landing page Log in to Envoyce. After a successful login you’ll typically arrive at the summary page.
Click Invoices and select Create invoice.
The New Invoice page will appear and all your customers will be shown in the dropdown list.
Select the customer to add to the invoice. If you want to create a new customer, click the New Customer button.
When you’ve selected your customer, you’ll advance to the settings panel.
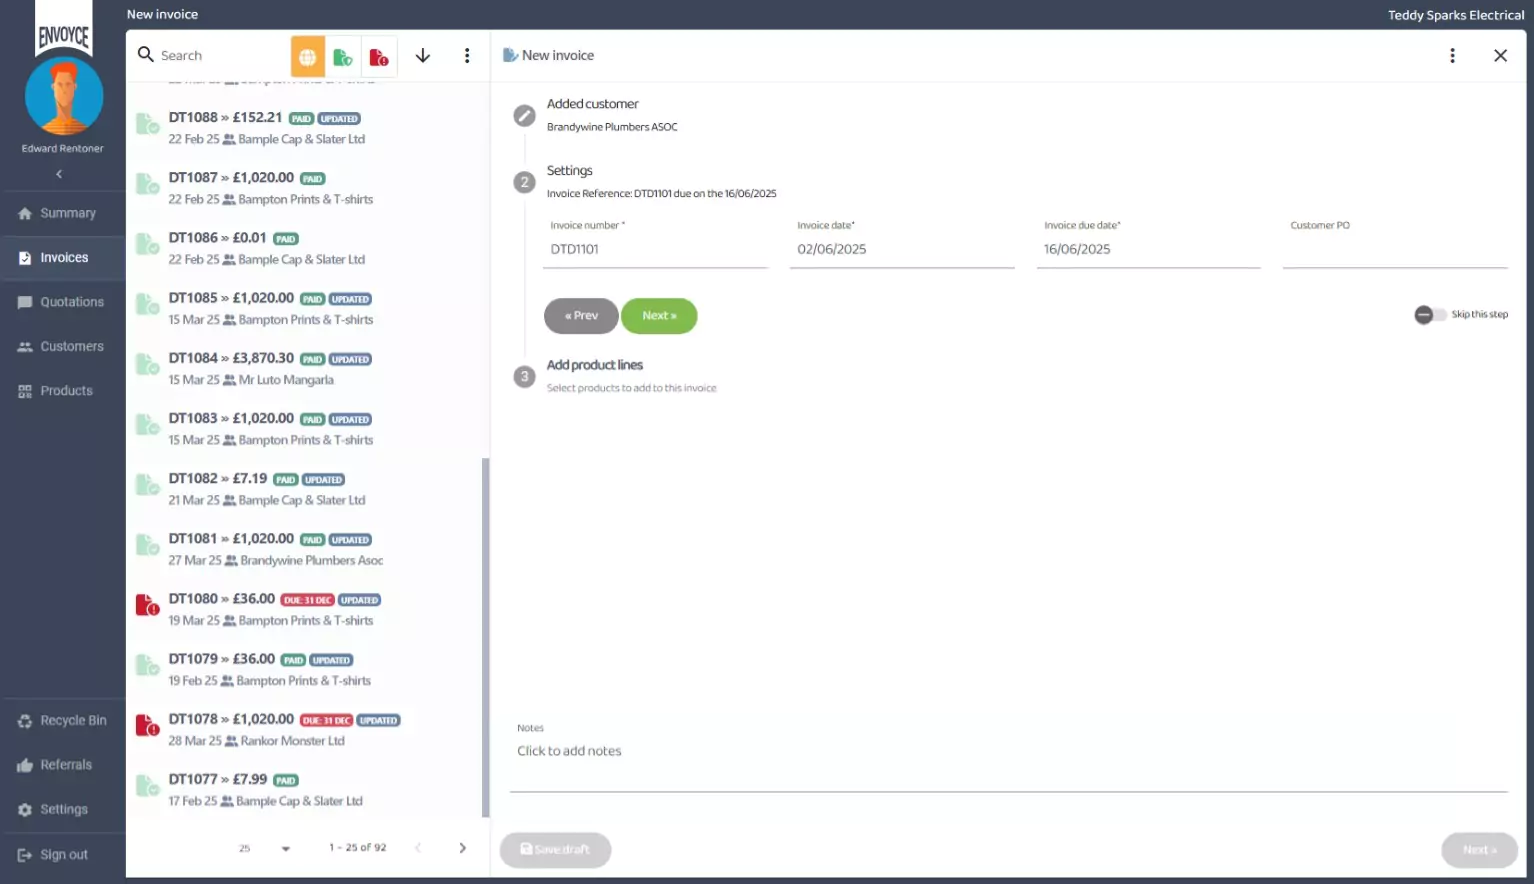
The controls in this panel are for the most part configured automatically. Let’s take a closer look at these settings.
Invoice number
The invoice number is a merge of your business initials and the starting number defined in your profile settings. By default, the invoice starting number is 1000, but both the prefix and the number can be changed in the profile settings.
When a new invoice is created Envoyce tries to calculate the next invoice number based on the previously saved number sequence. The number that is calculated for you can be overwritten, but any new invoices will derive from this new number.
For example, if the current latest invoice number is 1003, the next number will be calculated at 1004 and so on. However, if you manually change the number from 1003 to say 1010, the next calculated number will be 1011 missing the intervening numbers.
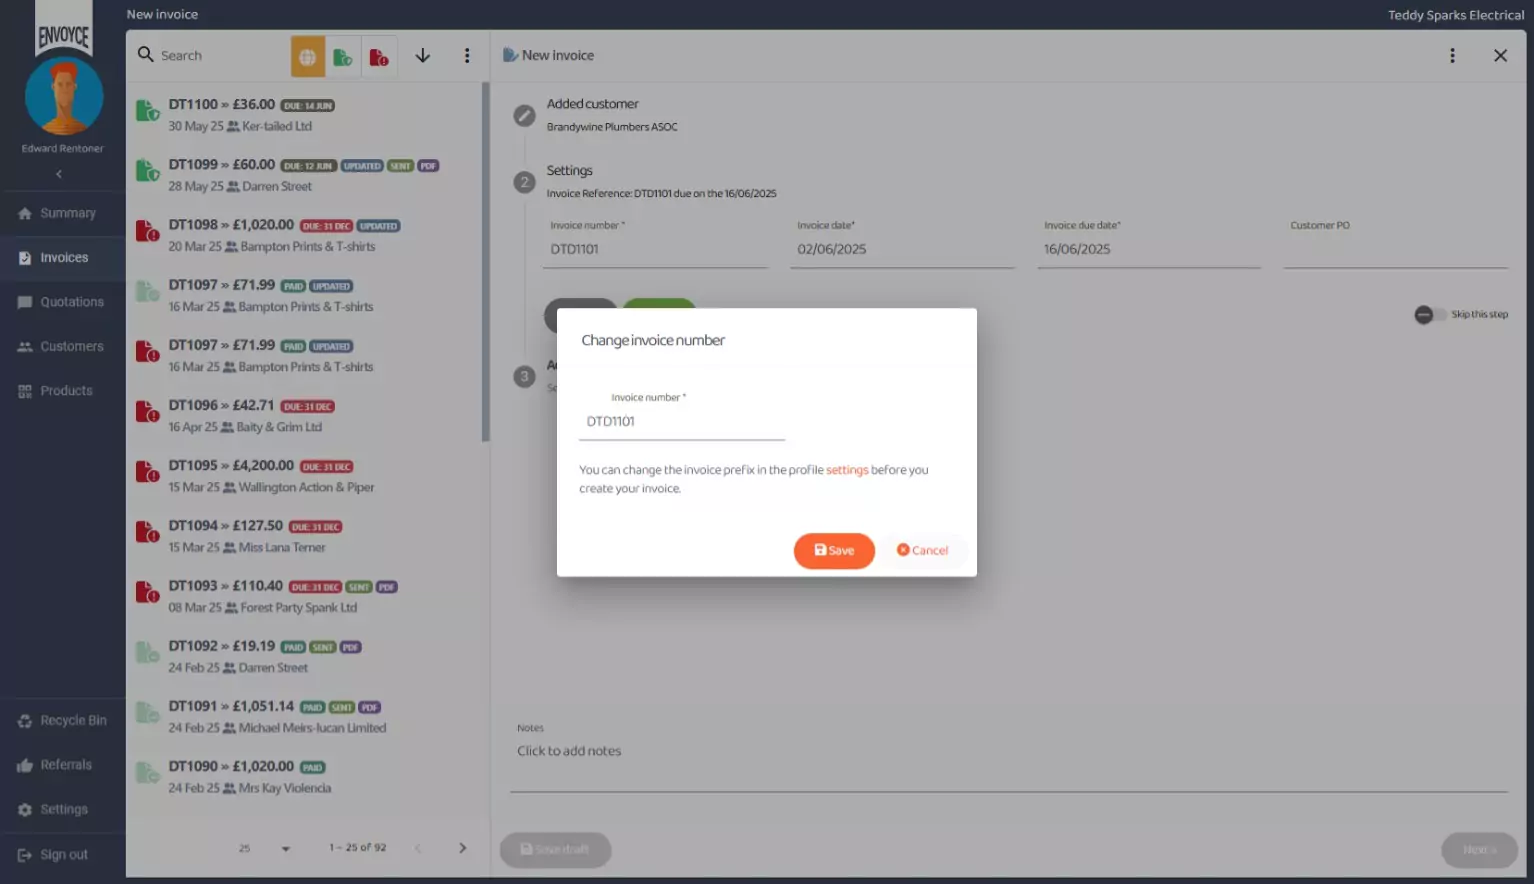
To change the invoice number, click the invoice number box and select a new number and Save. Note, that you will not be able to change the invoice prefix as this needs to occur before you start the invoice creation processes.
Invoice Date
The Invoice Date is typically today’s date, you can select any date in the future but not a past date. Click the invoice date box to bring up the calendar picker.
Invoice Due Date
The Invoice Due Date is a calculated date that is based on the payment terms set when you first create your customer. The default value is 20 days but this can be changed in your profile settings.
When you create an invoice and select a customer from the dropdown, Envoyce will get the customer assigned terms value and apply it to the due date. Saying that, you can overwrite this value manually. Click the Invoice Due Date box and select your new date. You can only set a date from today and not in the past.
Customer Purchase Order
The last box is the Customer Purchase Order box and is used if your customer assigns you a purchase order number for your invoice. This value (if inputted) helps your customer validate your invoice, and should avoid payment delays.
If you find when you are creating invoices that you seldom change any of the settings in this panel, you can skip this panel completely (from the workflow) by selecting the “Skip This Step” option toggle. This means that the workflow will not stop on this panel and will advance directly to product lines.
If you’ve selected to skip, it doesn’t mean you won’t able to access the panel, it just won’t stop on it in during the invoice workflow. Click the settings header to open and edit it at any time.
Click Next to advance to the next panel
Add Product Lines
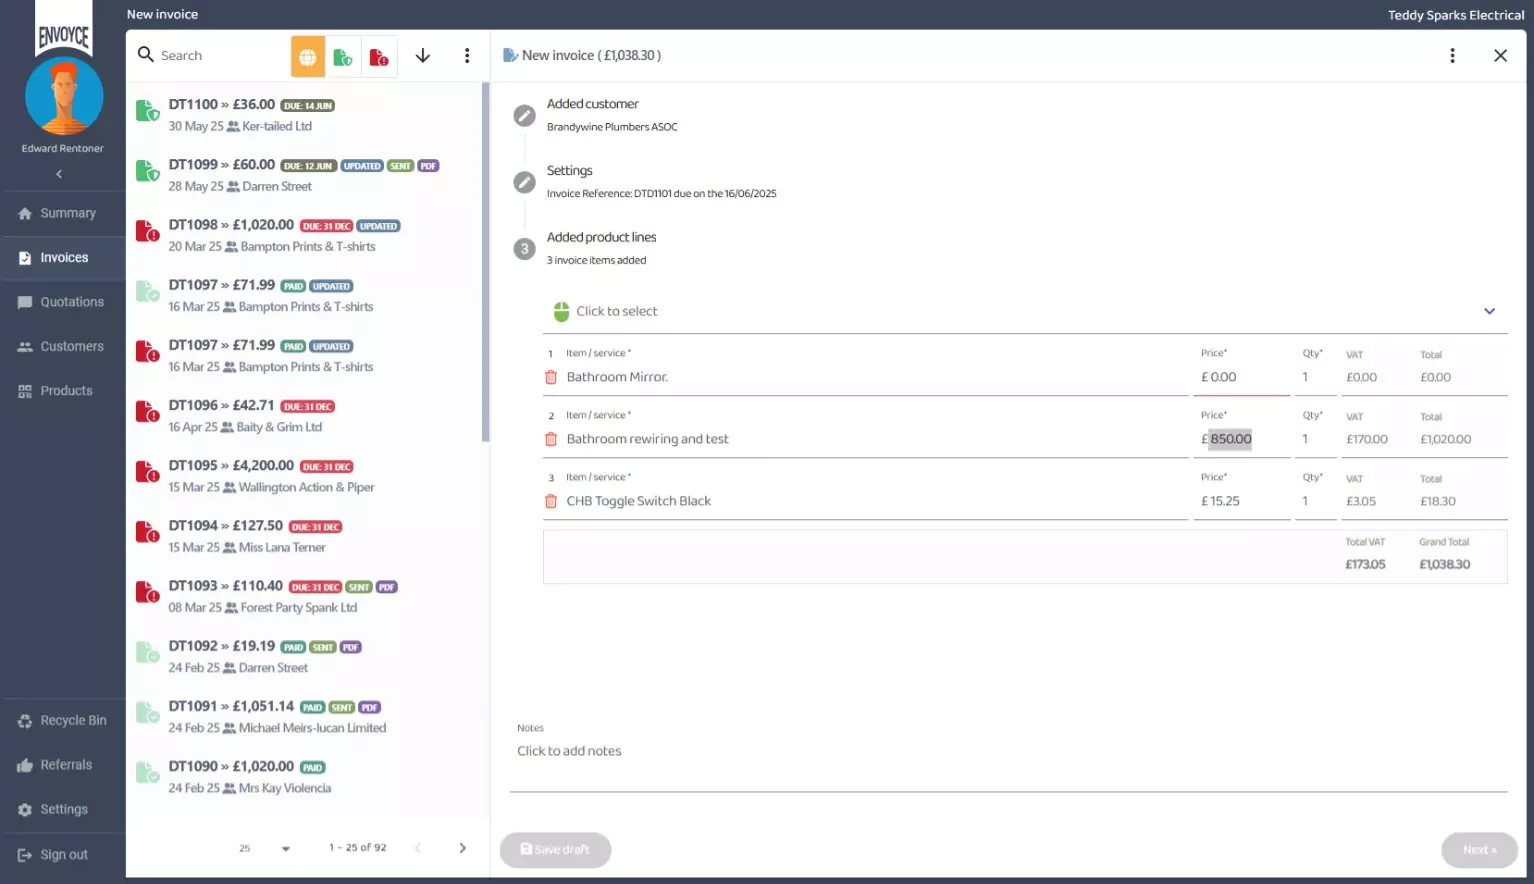
The Add Product Lines panel will be expanded and your products will be shown in the dropdown. Select a product to add, or create a New Product.
Once selected the product will appear in the lower grid.
This is how you assign lines to your invoice. You can add another item by clicking the “Click To Select” button again and selecting another item. In this way you continue to build the invoice with all the items your customer needs to be billed for.
If you select an item that you have already selected in the grid it won’t add a new line. It will increment the quantity value of the existing line instead. If you add a line but decide you don’t want it on this invoice you can remove the individual line by clicking the delete icon on the row, or right-clicking the row and selecting Remove Item.
Each row can also be edited in place. You can change the Item name by clicking in the box and editing it directly. Additionally, you can change the Price and Quantity values which will automatically update the line total, VAT value & Grand Total values.
Invoice Notes
The last box is right at the end of the form and it’s the Invoice Notes box. If you are using Envoyce on a mobile device you may need to scroll your page to view it. Use this box when you need to write a message to your customer. For example, explaining parts of the invoice or additional charges. This information can be written here. The finished message will appear on the invoice printed below the invoice lines grid.
Saving the invoice as a Draft
With the invoice data inputted, you’ll have a couple of choices how to proceed. You can elect to save the invoice as a draft and send it another day or you can finalise the invoice and send it to your customer now.
Saving the invoice as a draft will assign it the invoice number and load it into the invoice grid on the left. Your draft invoice will be closed.
The left grid will show your new draft invoice, the current value and customer assigned.
Selecting the draft invoice from the left grid will return you back to where you were in the new invoice workflow.
Removing the draft invoice
You can remove the draft invoice by selecting the Additional Options menu in the draft invoice pane, and selecting Remove Invoice. You can also remove the draft by right clicking on the invoice in the grid and selecting Remove Invoice.
Let’s preview and finalise the invoice and get it sent to your customer. Select the draft invoice and hit the green Next button to open the preview pane
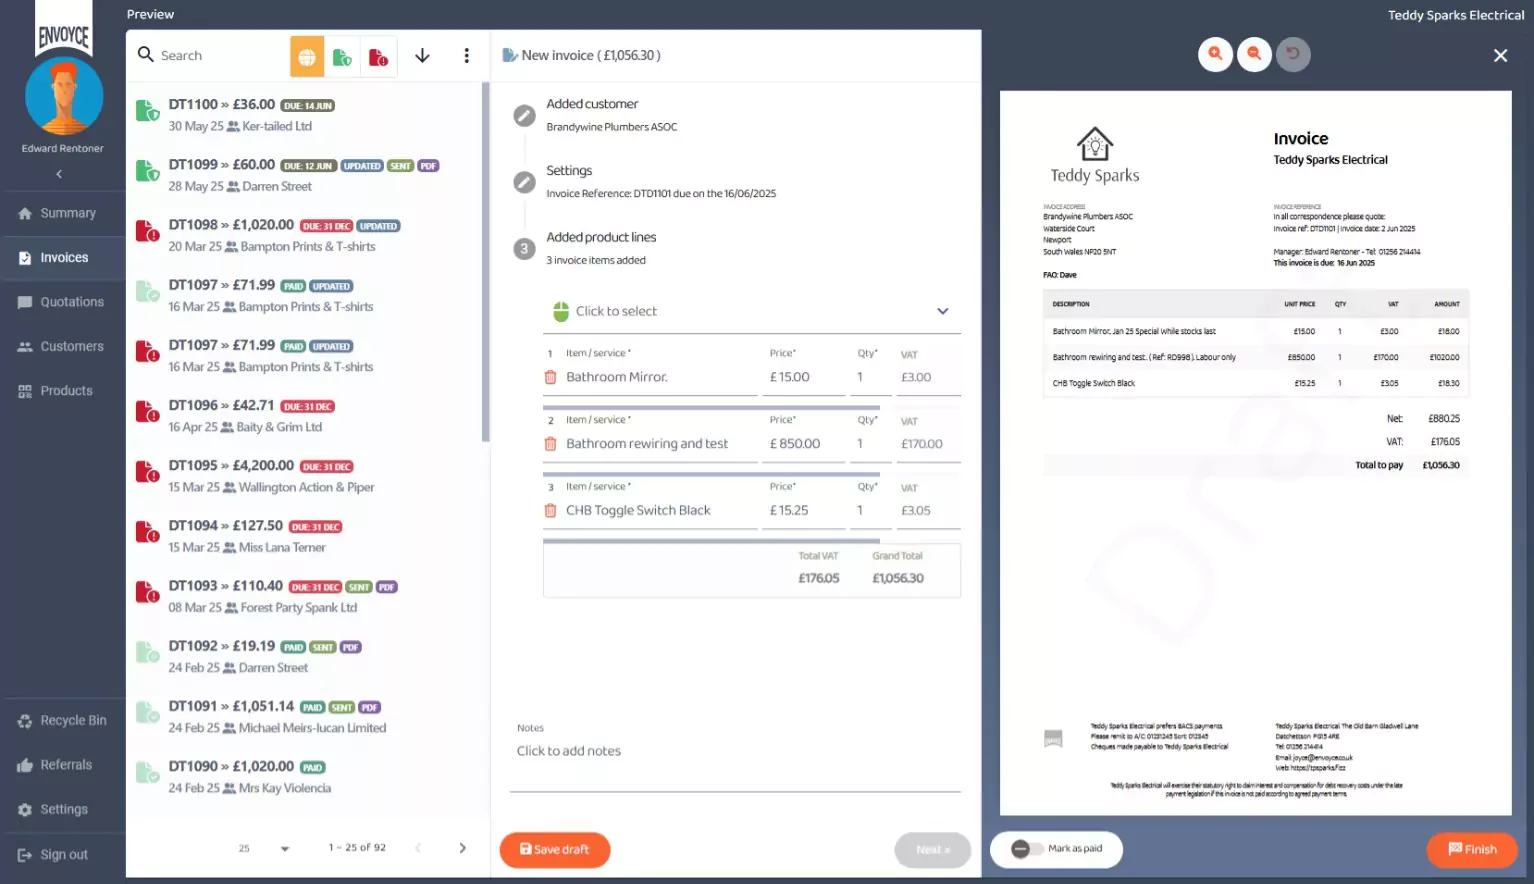
Preview the draft invoice
A preview of your invoice as it will appear to your customer will be generated. If you are using a laptop or desktop computer both the invoice grid and the preview panes will be shown & editing is still enabled at this stage. If you make changes to the invoice editing pane, these changes will automatically be applied to the preview.
If using a phone, you’ll need to toggle the pane between preview and invoice grid using the X close button.
If you have a business where you take payment in advance but still need to create a tax invoice, click the Mark As Paid toggle in the preview pane. Doing so will mark the invoice as paid and update your financial status.
Finalise the draft invoice
When you are happy your invoice is correct and are satisfied everything is in order, click the Finish button.
A dialog reminder will be shown checking that you are happy with the invoice. When you finalise an invoice, it will be rendered permanent. You won’t be able to make changes to it. Once finalised you can only remove an invoice.
Once you get into the habit of checking your invoices before you finalise them, you’ll quickly tire of this message, so you can dismiss it permanently by clicking the “Don’t show this message again” toggle, to speed up the workflow.
Click the Finish button and the invoice will be saved and processed, the edit pane will disappear and be replaced with the tasks pane on the right.
Live Invoice
You invoice is now “live”, the invoice is shown on the left grid and any draft copy will be removed. The due date for payment will also be shown in the grid. The grid will automatically update if the invoice remains unpaid after the due date and the invoice grid colour will be changed to reflect the severity of lateness.
The tasks pane relates specifically to the invoice currently selected & you may need to scroll down to see all the items.
Many of the tasks are self-explanatory but typically you’ll need to email your invoice, download it or use an Instant Messager app locally installed on your computer to deliver it to your customer.
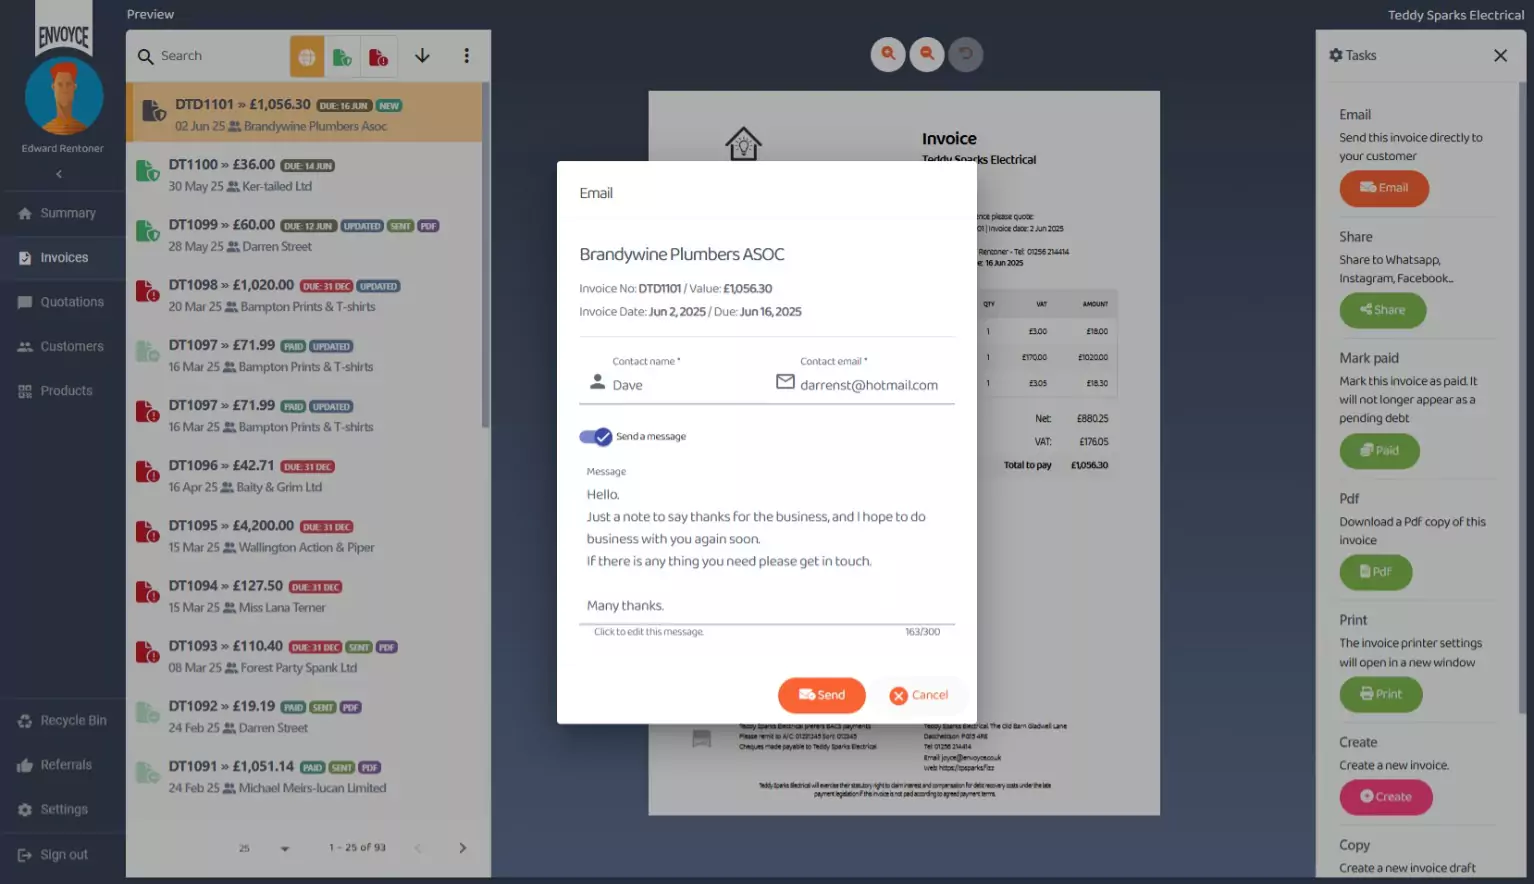
If you decide to send it by email, please note that everything including the Contact Name, Email address and the associated email message is editable.
That’s it for today. You now know everything you need to know about creating, editing, drafting and removing invoices in Envoyce.
Thanks for reading. Until next time.